CHRIS RAMSEY WOODTURNER/CARVER
Welcome | About | Plans and Instructions | Tips and Tricks | Turned and Carved Art
Hats | People | Articles and Videos | The History of the Wood Hat | Links | Contact
- How to Make a Hat Bending Jig -
MATERIALS
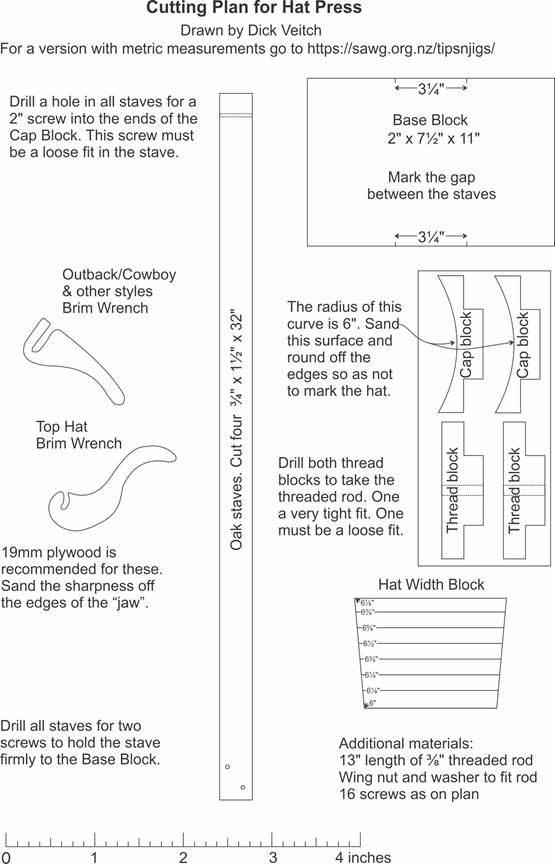
One 2" x 8" x 11" long (Base Block) exact measurements are 7 ½" x 1 ½" x 11" (Pine is OK to use, I have used scrap Walnut for my benders)
Four pieces of Oak 1" x 2" x 32" (Oak Staves) exact measurements are ¾" x 1 ½" x 32"
One piece of all thread 3/8" x 13" long
One 3/8" washer
One 3/8" wing nut
One piece of any hardwood (I use Walnut) 2"x 6"x 2 feet. Out of this piece of wood you will cut two pieces of the all thread blocks and two pieces of the cap cups from the patterns included on the templates page. Templates for these items are below. See photo #11
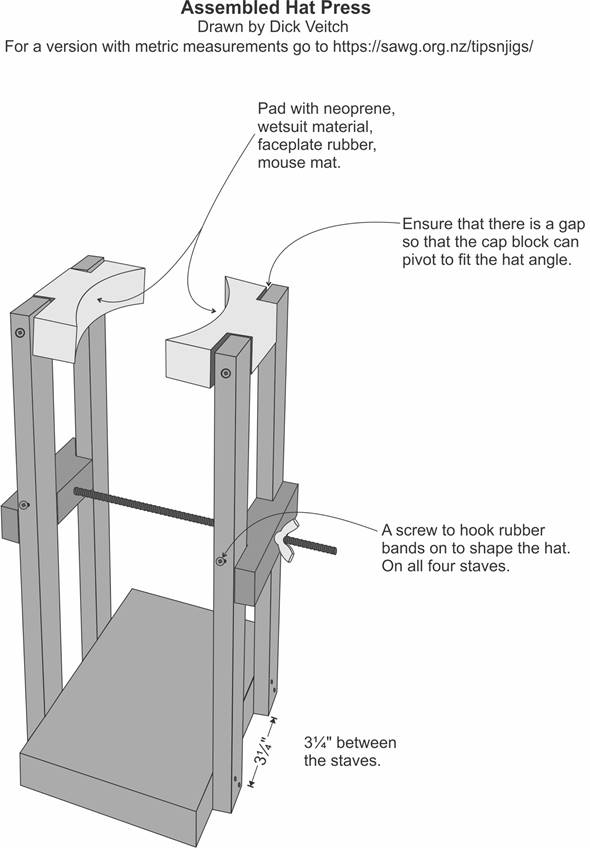
When all parts have been acquired and all pattern cuts have been made, assembly of the bender takes just a few minutes.
ASSEMBLY
Lay out the markings for the staves on the base block by measuring the 11" inch block from left to right. Make a mark at 3 ¾" and 7" on each of the two long sides of the base block as pictured in photo #1.

Photo #1
Pre-drill oak staves on bottom and fasten to base block as pictured. (#2)
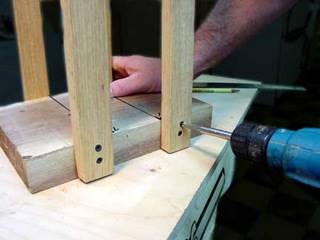
Photo #2
Pre-drill 1/16" hole on the outside edge of each stave 18" from the bottom as pictured (#3) and install one 1" drywall screw. The screws are for the rubber bands to hook to as bending and shaping occur.
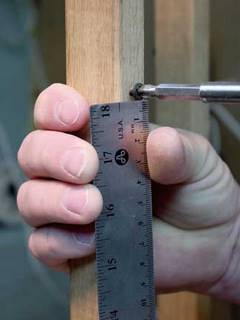
Photo#3
Pre-drill and countersink the center of the outside edge of the staves ¾" down from the top of the staves. Drill all the way through the staves with a 1/16" drill bit. Countersink the holes ½" and attach the cap cup block as pictured in #4
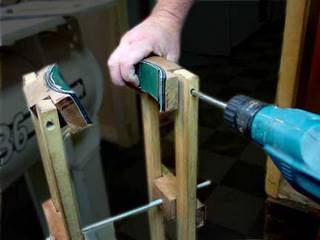
Photo #4
Make sure to leave a 1/8" gap between the stave and the cap cup block so that the block can pivot up and down and will conform to the angle of the hat to be bent. (#5)
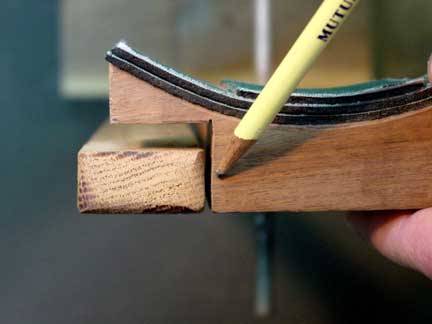
Photo #5
Install all thread through all thread blocks and install on bender as pictured. (#6)
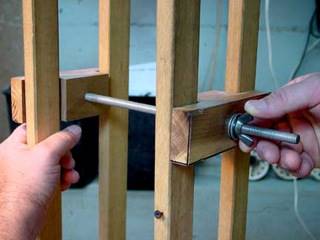
Photo #6
I have included a template page for two kinds of brim wrenches, the Cowboy/Outback and the Top Hat brim wrenches. The wrenches should be made of ¾" stock with the corners and sides sanded smooth. Included are pictures of the brim wrenches in use. (#7)
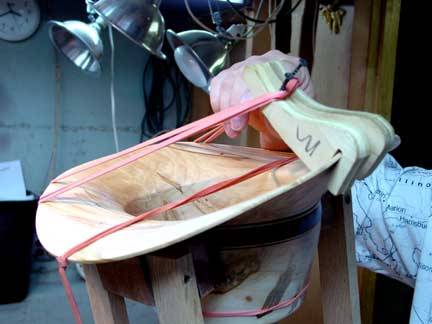
Photo #7
Included is a picture of a template made from the head measurement. This insures that the hat will fit perfectly IF the measurement was done correctly. Use the drawing of the measurement to make a template. Cut out the paper template and transfer it to a piece of stock that is ¾” thick. Cut out the template on a bandsaw then sand the edges so that they are smooth.
The head measurement template is used when the hat reaches the final width needed for the person's head. It is installed as pictured in the hat. Remember to place it in the hat upside down because the hat in the bender is upside down. This template should be inserted when the hat becomes oval enough to accept the template. The hat will shrink to the size of the template if the head was measured correctly and the outside diameter of the hat was turned precisely. See photo #8
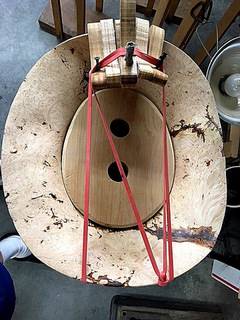
Photo #8
A hat width block can also be used and installed when the hat is in the bender and has bent to the side to side head measurement as pictured in photo #9.
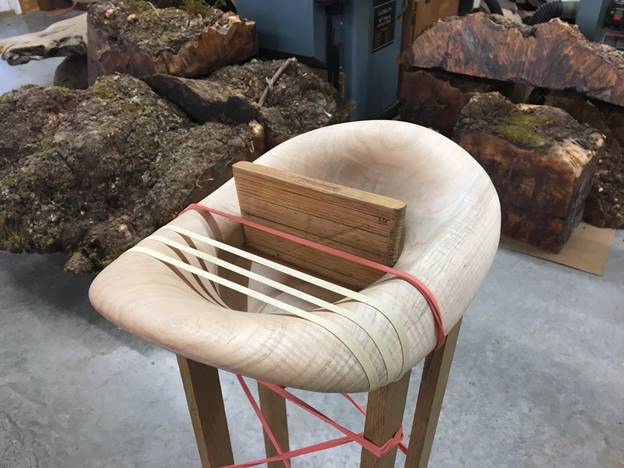
Photo #9
I have included templates for a hat width block and brim wrenches for the outback hat and curved brim wrenches for the derby and top hat pencil-rolled hat brims. Also included is assembly instructions for the hat bender.