CHRIS RAMSEY WOODTURNER/CARVER
Welcome | About | Plans and Instructions | Tips and Tricks | Turned and Carved Art
Hats | People | Articles and Videos | The History of the Wood Hat | Links | Contact
Building a Mini Hat Bender
You will need to make a mini hat bender (or several) to complete the bending process of a mini hat. The same bender can be used for every style of mini hat that you create.
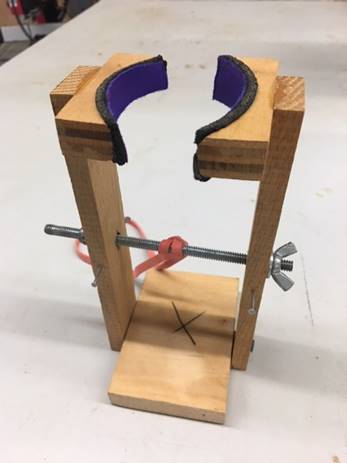
Pictured below is a mini hat bender that I built that will help you understand how to complete you own mini hat bender.
Start with preparing all of the wood needed for your bender.
I used oak for the staves of the bender and recommend that you also use oak. I used maple for the base as well as the cupped holders that hold the mini hat.
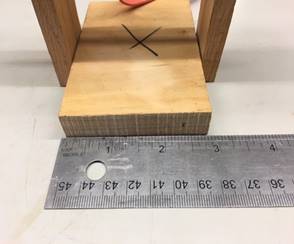
Cut two pieces of oak that measure 7 inches long by 3/8ths inch thick by 1 ¼ inch wide as pictured below.
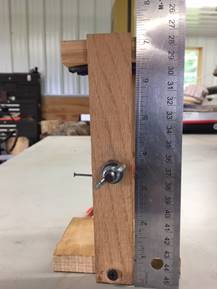
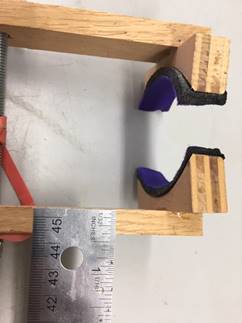
Drill a 3/16ths hole up 3 ½ inches in the middle of the staves as in the first picture. This is so later and when it is assembled a piece of all thread can go through both holes with a wingnut, washers and a locking nut. You will also need to install four small nails (two on each stave) as pictured above. The nails will be used to hook rubber bands onto the staves in the bending process.
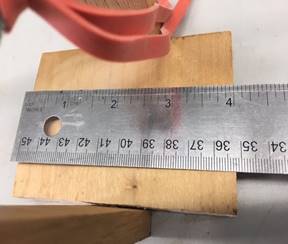
Cut the base block measuring 2 ¾ inch wide by 4 inches long and ¾ inch thick as pictured below.
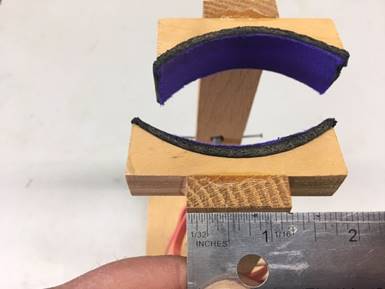
Cut two cup blocks at ¾ inch thick by 2 ¾ inch wide by 1 inch deep as pictured below.
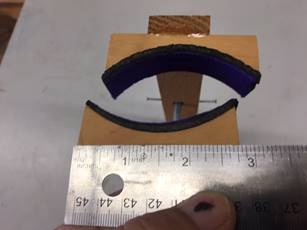
Cut a radius of 3 ½ inches into the cup blanks leaving ¼ inch in the middle of the radius and 1 inch at each end as pictured above.
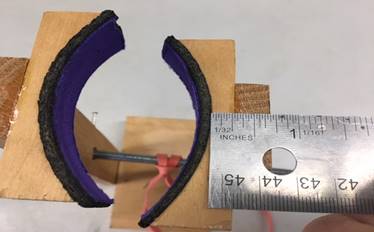
Use a piece of a mousepad or a piece of neoprene that is ¼ inch thick for padding on the cups. Use spray adhesive to secure the neoprene to the cup blocks as pictured above.
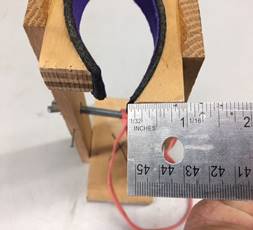
Now assemble the mini bender as pictured below. Be sure to pre-drill the oak staves before screwing them to the base and do not tighten the screws all of the way. Leave a 1/16 inch gap in between the stave and the base block. The staves need to be able to move just a little bit as the mini hat dries and moves into an oval shape.
Use CA glue to secure the cup blocks to the top of the staves and make sure to center the cup blocks on the staves. Make the top of the cup block even with the top of the staves as pictured below.
Install the all thread using washers on both sides, a locking nut on one side and a wing nut on the other side.
Now you are ready to use your mini hat bender.
