CHRIS RAMSEY WOODTURNER/CARVER
Welcome | About | Plans and Instructions | Tips and Tricks | Turned and Carved Art
Hats | People | Articles and Videos | The History of the Wood Hat | Links | Contact
How to Build a Mini Lighted Jam Chuck
The advancement in LED lighting technology inspired me to create an LED lighted jam chuck for mini hats. It is so much easier to set up and use than the old plug-in style and takes much less time in the set-up process.
Start between centers using a spur drive in the headstock with a block of dry timber that measures 7 inches by 7 inches by 4 ½ inches. The 4 ½ inch measurement should be the end-grain measurement so there is little to no movement in the finished jam chuck.
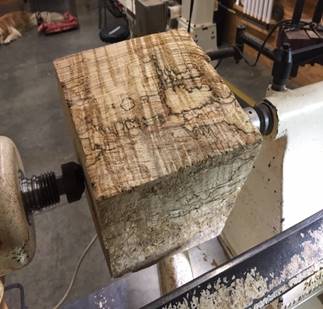
Round the blank as pictured.

Flatten the bottom of the blank and turn a 3/8ths inch by 2 7/8 inch wide tenon as pictured.
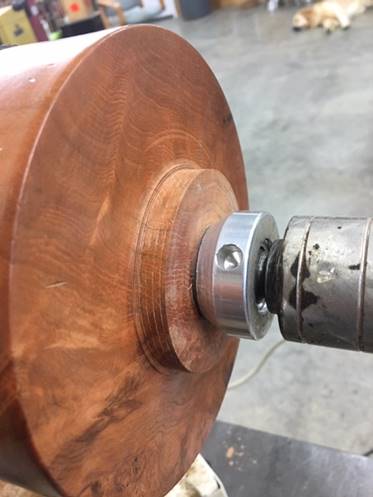
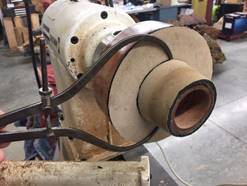
Using a Stronghold chuck with the #2 profiled jaws install the tenon on the bottom of the blank into the #2 jaws. Round the blank then turn a 2 7/8 inch tenon on the other end of the blank.
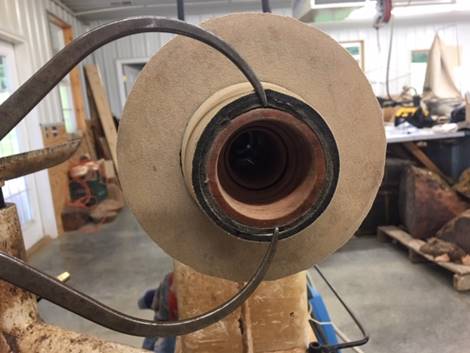
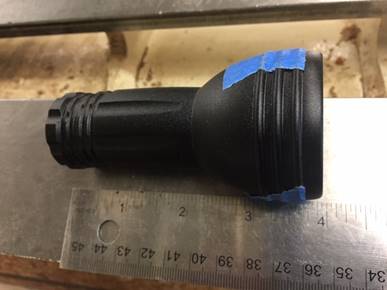
Purchase a small LED flashlight. I got mine from Harbor Freight with 1 1/4 inch shaft by 4 inches total in length (pictured in step 12). Your flashlight might be a different diameter. Measure the diameter of the shaft of your flashlight. Using a Forstner bit the same diameter as the shaft diameter of the flashlight and drill a hole all of the way through the blank as pictured below.
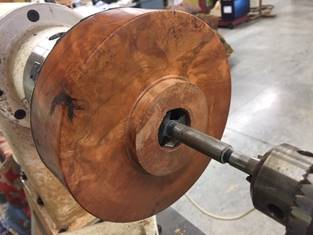
Hold the blank by the bottom side in the chuck as pictured and turn the blank from the bottom of the blank up 2 inches (as pictured below).
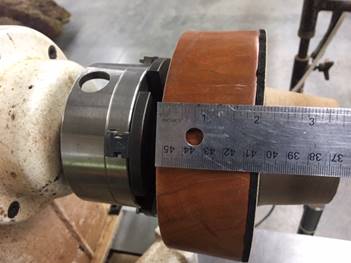
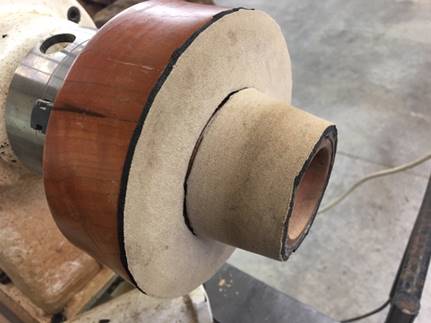
Turn the surface inward toward the center of the blank and flat to a diameter of 2 7/8 inches at the base of the taper in the location where the calipers are pictured below. (My jam chuck is already covered with neoprene.)
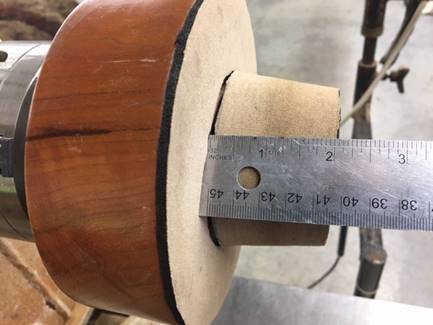
At the other end of the tapered jam chuck (the top end where the calipers are positioned) turn the diameter to 2 ¼ inches as pictured below.
The length of the taper from the base of the taper to the top of the taper is 2 inches as pictured below.
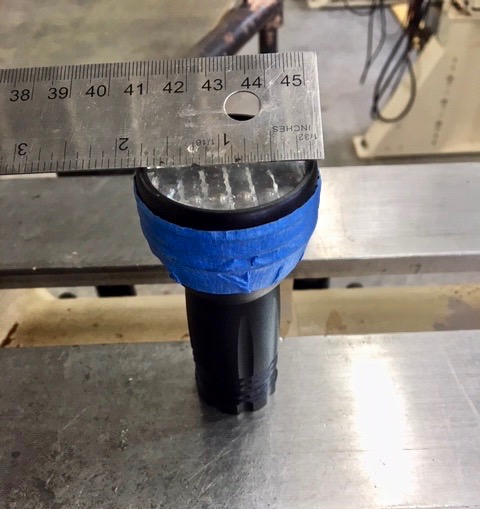
Now measure the large end of the flash light diameter as pictured below. My measurement is 1 7/8 inch.
Previously you had drilled a hole the diameter of the shaft of your flashlight all the way through the lighted jam chuck. Now, using a Forstner bit, drill a 1 7/8 inch diameter hole the depth of the flashlight head so that the flash light can be mounted inside the jam chuck as pictured below.
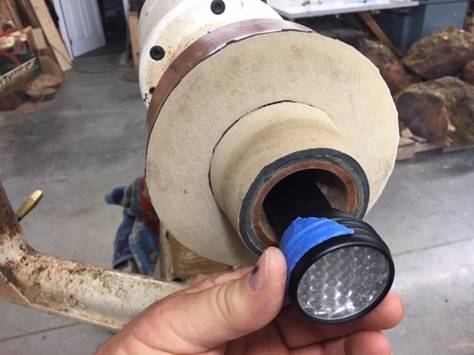
My flash light is pictured below and has a bowl shaped head. I used the Forstner bit and drilled down approximately 1 inch then turned the remainder of the bowl shape with a mini gouge so that the flash light would fit snug into the hollowed area. I recommend sanding the inside of the hollowed area so that the flash light can be installed and removed easily. I put a piece of tape around the head of the flash light so the light would fit tightly inside the hollowed out area.
Now cut a 7 inch diameter piece of ¼ inch thick neoprene with a 2 7/8 inch hole in the middle. Use spray adhesive and spray the flat area of the jam chuck and the back side (the rubber side) of the neoprene. Let the spray adhesive dry for one minute then install on the flat area of the jam chuck as pictured below. It is best to use ¼ inch neoprene but 1/8th inch neoprene is acceptable to use on the flat area.
If you can’t find ¼ inch thick neoprene then use two pieces of 1/8 inch thick neoprene (as I had to do) on the tapered section of the jam chuck. It is best to make a paper template of the tapered section of the jam chuck. Since the area is tapered the piece of neoprene will be shaped like a rainbow as pictured below.
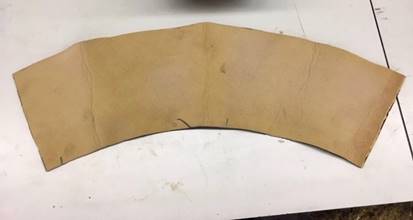
Wrap a piece of paper around the tapered section and cut to fit. After test fitting the pattern cut a piece of neoprene using the paper pattern and be sure to leave the neoprene about ¼ inch longer than you will need. Test fit the neoprene on the tapered section of the jam chuck. Use spray adhesive on the tapered section and on the rubber side of the neoprene, allow to dry for one minute then wrap it around the tapered section. Overlap the end then use a razor knife to cut through both the overlapped neoprene and the neoprene against the wood and this will give you a perfect butted seam where the two ends of the neoprene meet as pictured below. If you have used the 1/8 inch thick neoprene you will need to add another piece of neoprene as pictured below.

My flash light has an on off button on the bottom of the flashlight (pictured).

I use a dowel to turn the light on and off by inserting the dowel through the headstock spindle and pushing the button as pictured below.

Now your mini LED lighted jam chuck is ready to use.